How To Build A Niche In A Bathroom Wall
How To Make A Wall Niche Wall Niche Master Bedroom Remodel Remodel Bedroom

How To Make Shower Niches Work For You In The Bathroom Shower Niche Bathroom Shower Walls Bathroom Niche

Shower Niche Tutorial Shower Niche Shower Shelves Bathroom Niche

Pin By Homearch On Homearch Renovations Tile Shower Niche Shower Niche Bathroom Niche

Build A Wall Niche Wall Niche Wall Storage Build A Wall

Make Niches For Toiletries Unlike Clunky Over The Showerhead Organizers A Recessed Cubby In A Tub Or Sh Bathrooms Remodel Shower Niche Bathroom Inspiration

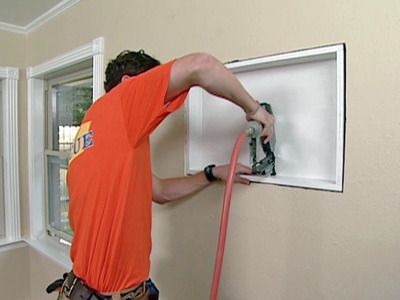
Apply wood glue to the ends of the vertical pieces and attach the top and bottom with brad nails.
How to build a niche in a bathroom wall.

30 Ideas To Use Storage Niches In A Bathroom Earthy Bathroom Shower Niche Eclectic Bathroom

How To Make Shower Niches Work For You In The Bathroom Shower Niche Shower Alcove Recessed Shower Shelf

Prefab Shower Niche Shower Niche Shower Shelves Bathroom Design Small

How To Make Shower Niches Work For You In The Bathroom Shower Niche Shower Shelves Bathroom Design

Shower Niches Between The Studs Shower Niche Traditional Bathroom Shower Shelves

Bathroom Niche Design Ideas Pictures Remodel And Decor Bathroom Niche Niche Decor Wall Niche

Page Not Found Projeto Do Banheiro Design De Interiores De Banheiro Ideias Para Casas De Banho

Interior Design Blog Shower Niche Small Master Bathroom Master Bathroom Design

Clear Glass For Shower Niche Shower Remodel Shower Niche Bathroom Niche

Attingham Mist Tile Bathroom Remodel Master Shower Alcove Bathroom Shower Tile

10 Unusual Beautiful Details To Steal For Your New Bathroom Shower Niche Bathrooms Remodel Bathroom Inspiration

How To Build A Shower Niche Shower Niche Recessed Shelves Recessed Shelves Bathroom

What Every Woman Loves About My Basement Wall Niche Basement Remodel Diy Shower Niche

How To Build A Niche For Your Shower Part 1 Built In Shower Shelf Shower Niche Shower Shelves

Make A Wall Niche Home Depot Canada Wall Niche Wall Nook House Styles

A Shower Niche Does Not Have To Have Matching Tiles Why Not Add A Bit Of Bathroom Wall Tile Bathroom Remodel Master Farmhouse Master Bathroom

Turning A New Build Into A Forever Home In San Carlos Ca Rue Bathroom Remodel Master Shower Niche Master Shower

Mesh Tape Mud Foam Niche Shower Niche Bathroom Wall Tile Shower Tile
Https Encrypted Tbn0 Gstatic Com Images Q Tbn 3aand9gcrpamdbeu9z3mxtbvf1db6ybf4k0r7bntcws3d Kwp0n440oxk Usqp Cau

Building A Nook Removed The Medicine Cabinet Bathroom Makeover Diy Bathroom Medicine Cabinet Makeover

Classic Modern Master Bathroom Update Reveal Master Bathroom Update Marble Tile Bathroom Glass Shelves In Bathroom

12x24 Grey Wall Tiles Shower Niche 2x2 Mosaic Floor Glass Stone Linear Mosaic Accent Stripe And A Gran Tile Shower Niche Shower Tile Bathroom Floor Plans

Long Narrow Niche In Shower Lower Shelf Could Be Used As A Shaving Stoop Foot Rest Shower Niche Glass Shower Tub Shower Shelves

How To Build Shower Niche Shower Niche Window In Shower Shower Shelves
Source : pinterest.com
